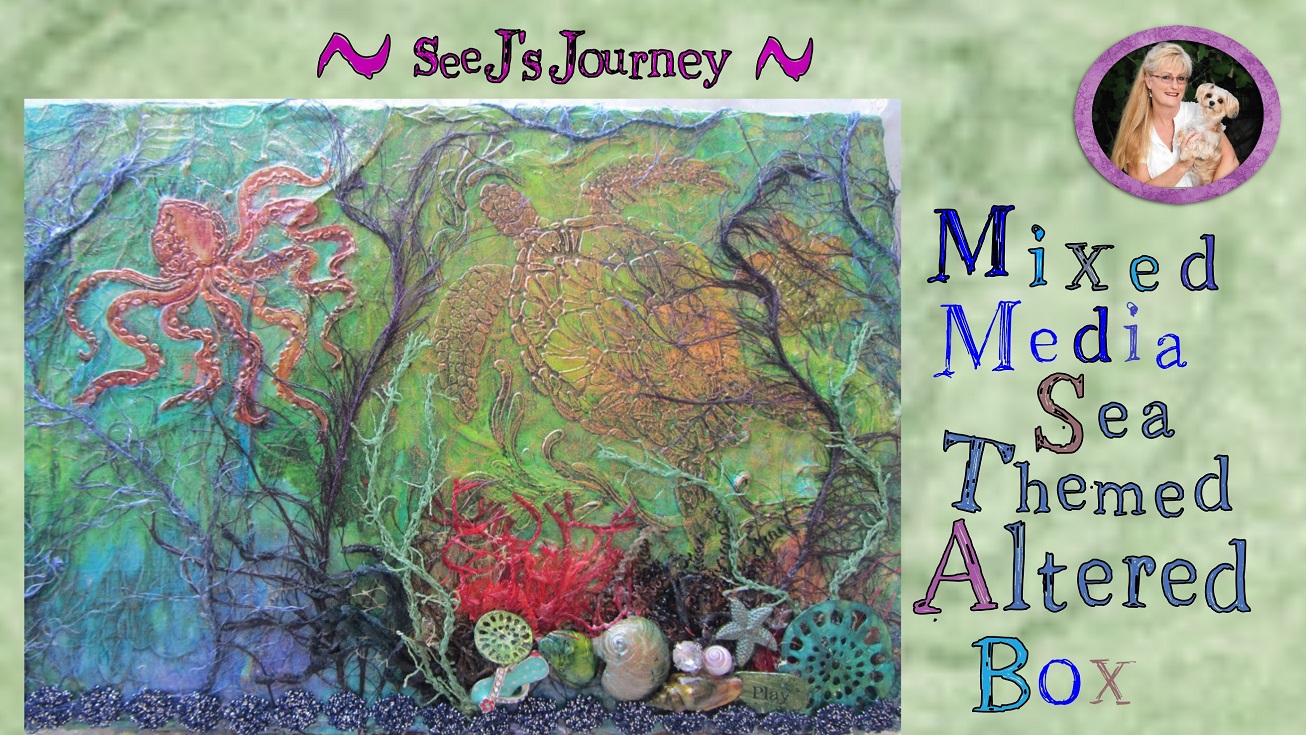
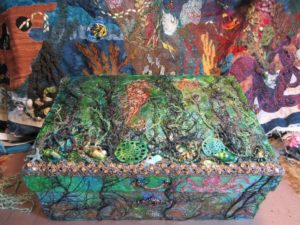
Mixed Media Sea Themed Box – Play 2019 08B SOLD
This is one of the mixed media Sea themed Box I made for Absolutely Fabulous in Huntington Beach for the 2019 Christmas collection.
It is an altered photo box that can be used for anything you like. It is called it Play.
You never know how they will turn out. I did three for the store, but want to make more for my gifts for Christmas. They are multi functional and I’m happy how they all turned out. They were all done pretty much the same way.
So here’s how I did it.
Supply List:
- Gift box; on this project I used photo boxes (approximate size 11 x 4.5 x8) next time I’m going to use the mini photo boxes.
- Paint brush and sponge brush
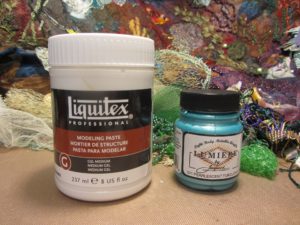
- Liquitex Molding Paste
- Lumiere by Jacquard pearlescent Turquoise
- TCW Sea stencils https://amzn.to/2DwH46a
- Art Basics Clear Gesso
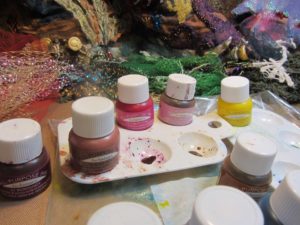
- Ranger Distress Paint (Brushed Pewter, Antique Bronze, Tarnished Brass)
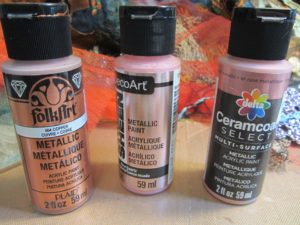
- FolkArt Metallic paints
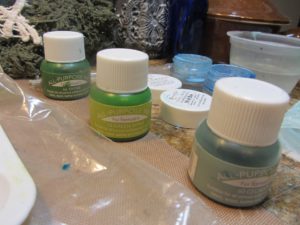
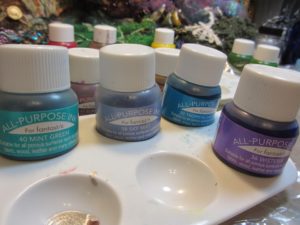
- Tsukineko All Purpose Ink from TSC Designs https://bit.ly/2SS4ngW
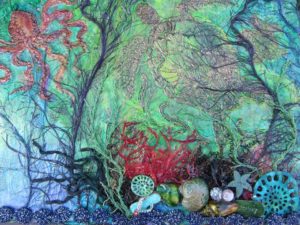
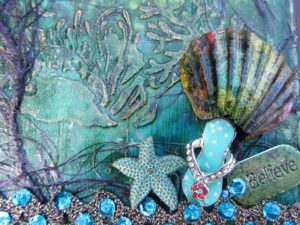
- Sea trinkets from my collection (ink dyed sea shells, name band, old jewelry that was painted, flip flops and star fish bought at Joann’s, and trim, etc.)
- Beacon – Power Tac glue
- Tacky Glue 50% with 50% water
- Metallique waxes – Copper and Aged Brass
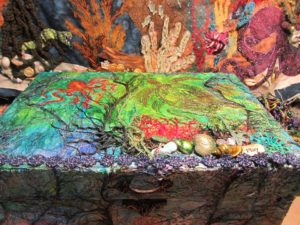
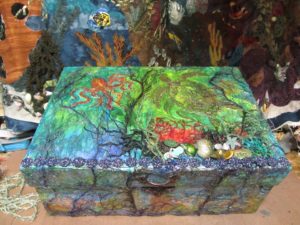
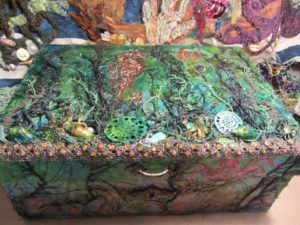
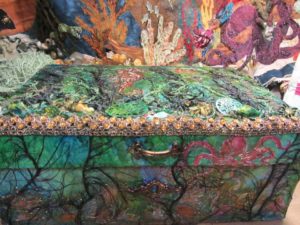
Play
Step One
Cover the box with Mulberry fiber paper. I used binder clips to hold in place and that really helped.

Step Two
Use a mixed of 50 % Tacky glue and 50% water, mix well and use a paint brush to glue the Mulberry fiber paper to the box.
Step Three
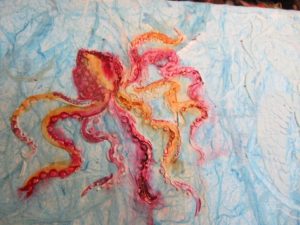
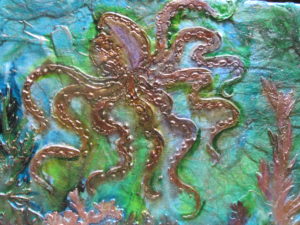
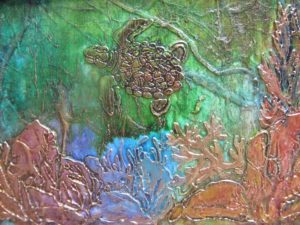
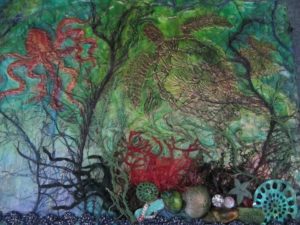
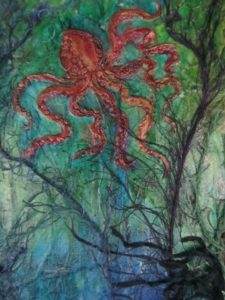
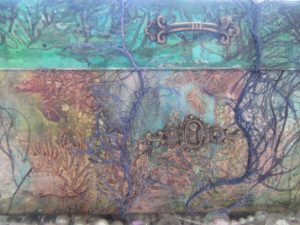
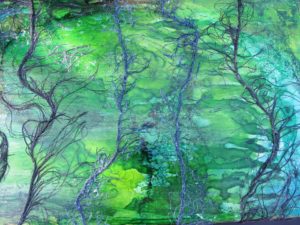
Use Modeling Paste and paint if you choose to color the modeling paste. I used Lumiere by Jacquard pearlescent Turquoise hoping it would be pearlescent but it wasn’t, but that might be because i didn’t use it straight. I used the sea stencils from TCW (sea turtles, octopuses and sea landscapes) and the modeling paste on the boxes in varying places.
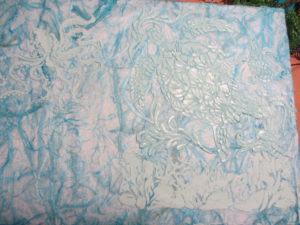
Step Four
Let Modeling paste dry completely and coat with Clear Gesso.
![]()
Step Five
Paint some areas of the sea creatures and sea landscape with Ranger Distress and Metallic paints. The inks will not stick to the areas you have painted so I like to go easy on the paint at first. You can always paint over ink.
Tip: If you have mixed up a batch of paint and love the color, but are done for the day. Put your brushes and paint in a sealed plastic bag. Best painting tip ever.
Step Six
Use Tsukineko All Purpose Inks to add color to the background. Use water to blend the colors. I use a little water in a container and water in a fine mist spray bottle and it works great. Champagne Mist mixed with water creates an awesome sparkle to any project.
Step Seven
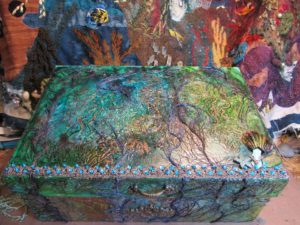
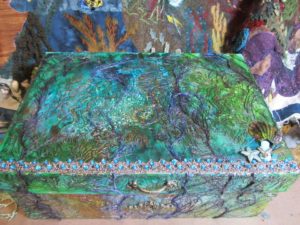
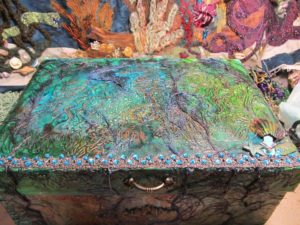
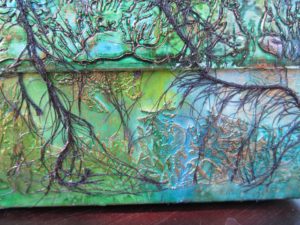
I love using yarn for texture on my projects. The scrubby yarns, extra long eyelash yarn and the Fancy fur yarns are the best. Wrap the yarn all the way around the box. I used the 50% Tacky glue and water mixture to secure the yarn in place. Let dry completely, and then clip the yarn so the top of the box will come off.
Step Eight
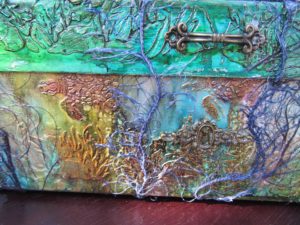
Glue a handle and keyhole to your box, paint with black paint or black Gesso and brush with Metallique waxes – Copper and Aged Brass are my favorite.
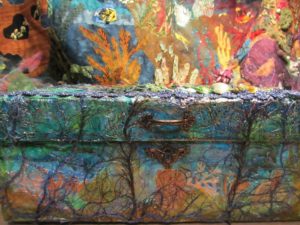
I use the Metallique waxes all over the box.

Step Nine
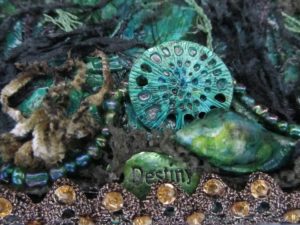
Select sea trinket that you think you would like to use on your project. First put them randomly around on the project to see if you have enough or too many. Arrange the trinkets on the box or you can design on something flat and all one color. I have the perfect light blue folder made out of a soft fabric that I frequently use.
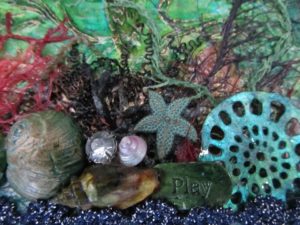
Begin gluing the trinkets on top of the box with the Power Tac. I find it to be the very best (low odor and not that expensive). Start by putting the trinkets that you know you want in a particular space. So start there and see what feels right next. I use the Power Tac glue by Beacon to glue my trinket on my boxes or tins because it has no odor and hold everything in place, but will give you some time to adjust if you need it.
Step Ten
Lastly, add trim if required.
Lastly, kept working with it until you are happy – I love to be happy!!
TIP: Keep painting and embellishing until satisfied with the look. Because there is no right or wrong, it is only done when you say that it is!
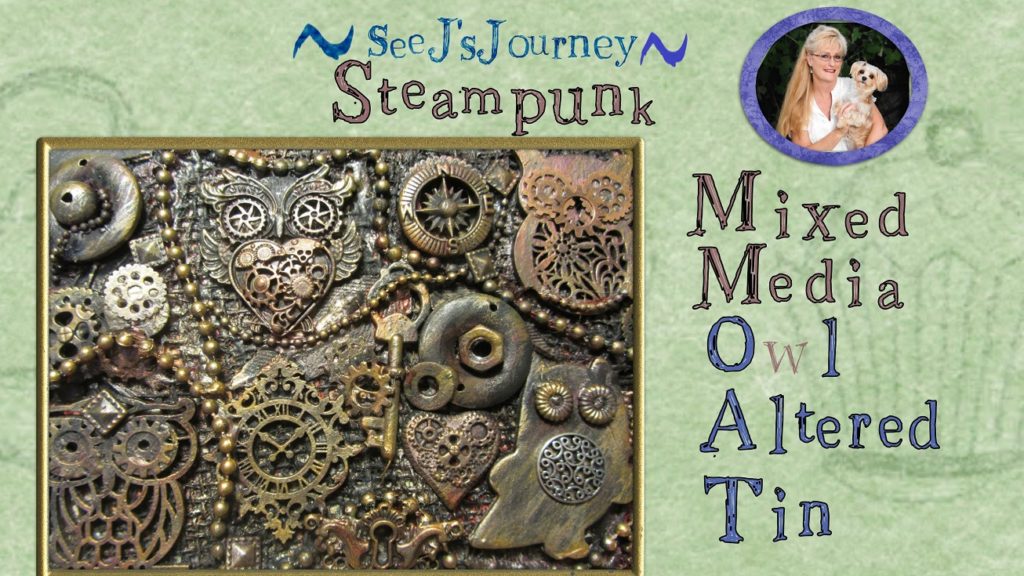
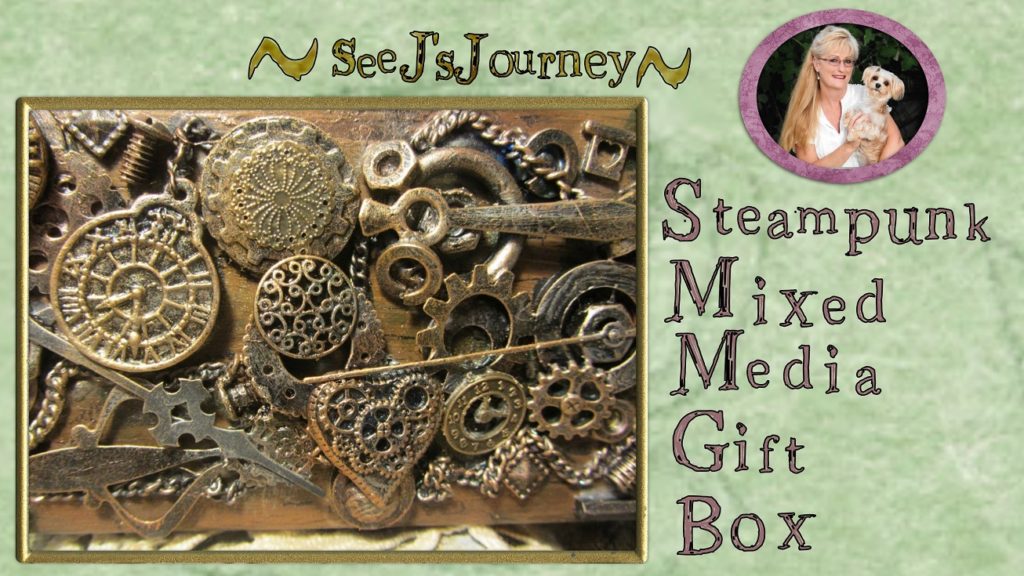
TIP: Collect old broken jewelry, gears, metal pieces, and watch parts, clock parts- you never know where they might end up on an altered tin or gift box.
Here are the pictures of the other two boxes.
Destiny

Believe
Stop by again and see where SeeJsjourney goes next because I am a maker and you never know what I will do next.
Another Mixed Media Sea Themed Altered Tins you might like:
http://www.seejsjourney.com/mixed-media-steampunk-altered-octopus-tin-top/
