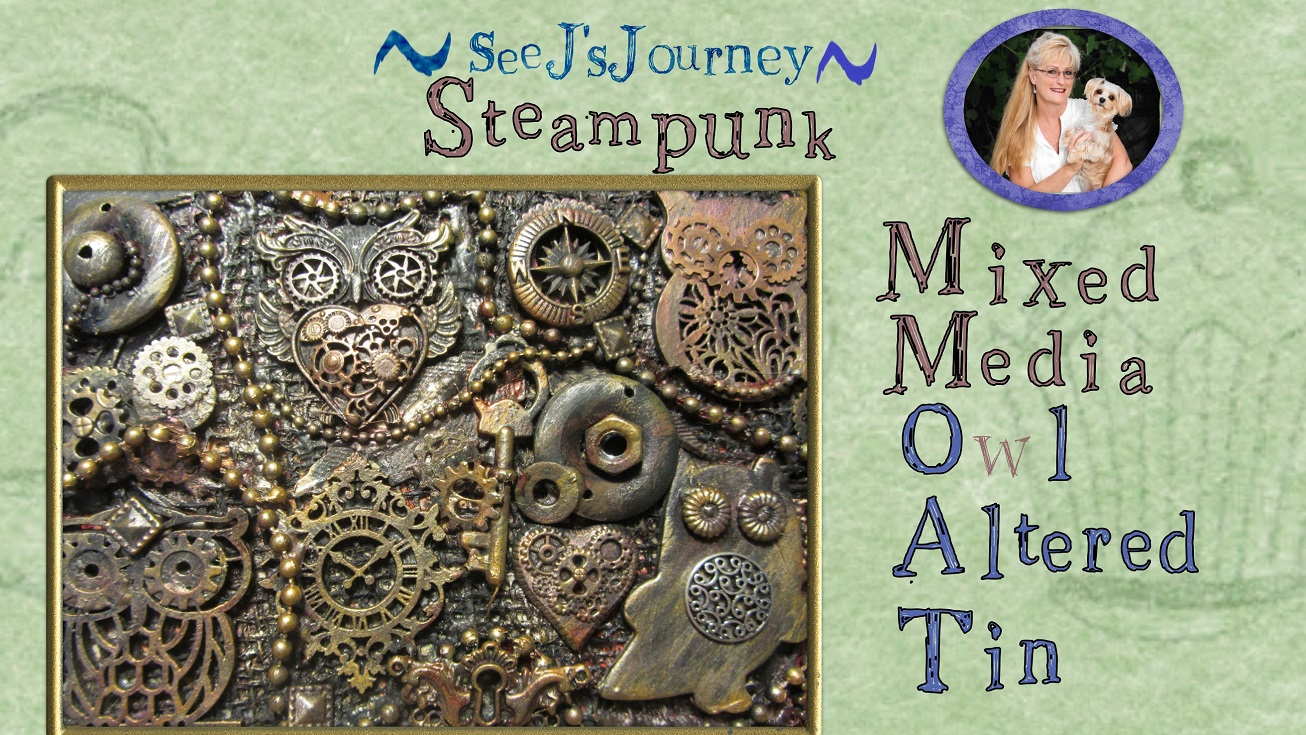
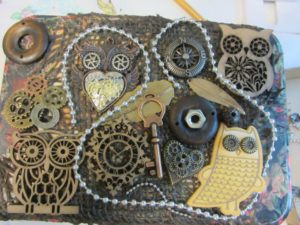
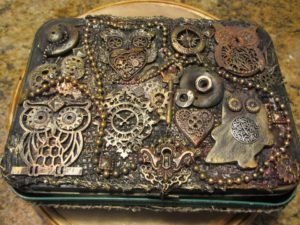
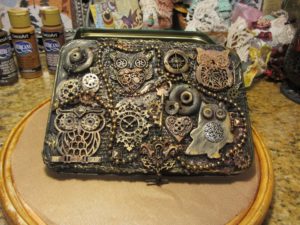
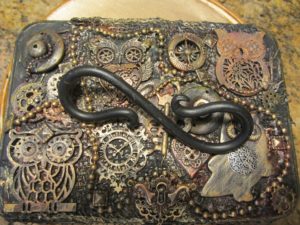
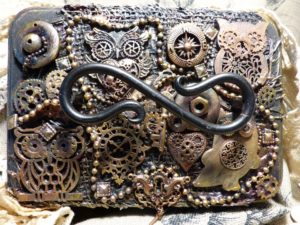
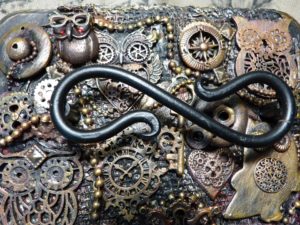
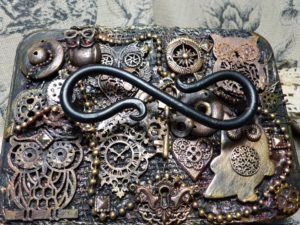
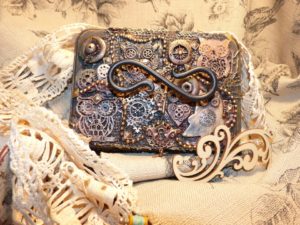
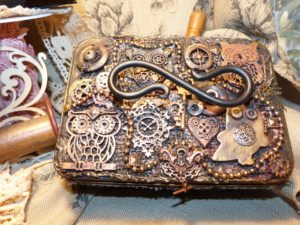
This is the steampunk tin I made for my husband. I call it “Steampunk Mixed Media Owl Altered Tin”.
Steampunk altered gifts are great for the males in your life. They can be done in different colors but for guys I like the blacks and browns with the gold and cooper metallic waxes on top.
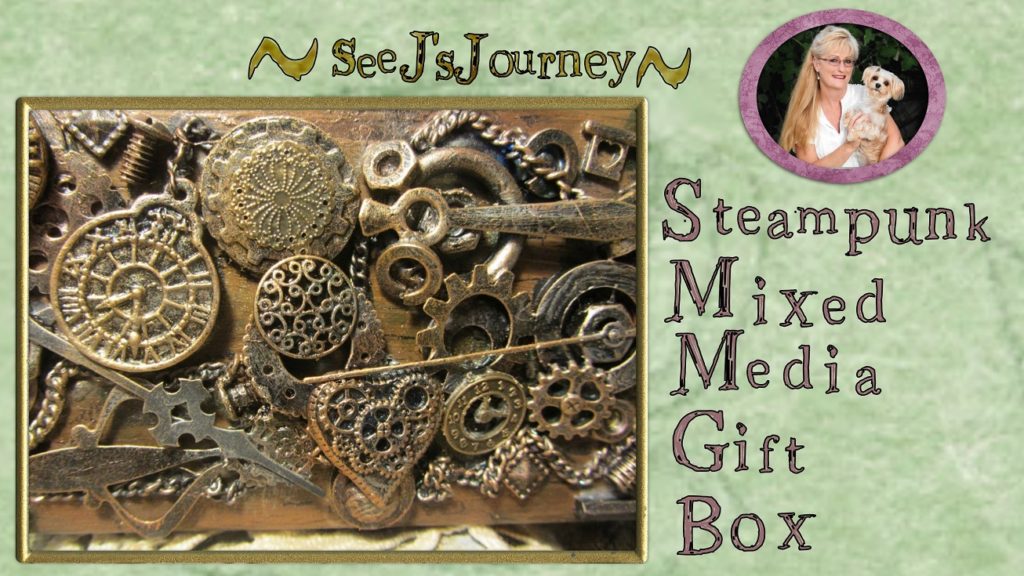
So here’s how I did it my steampunk mixed media owl altered tin.
Supply List:
Gift box, tin(s) or what ever you are altering
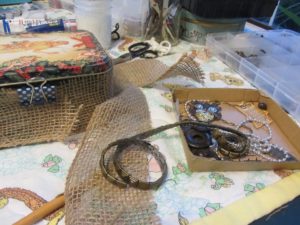
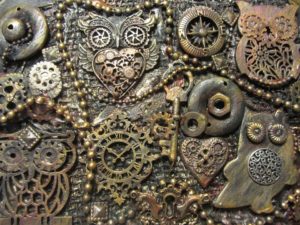
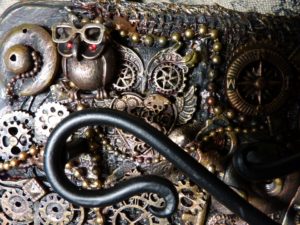
Trinkets from my collection (keys, clocks, gears, clock hands, chains, old jewelry, chipboard owls, nuts and washers, etc.)
Beacon – Power Tac glue
Tacky Glue 50% with 50% water
Art Basics Clear Gesso
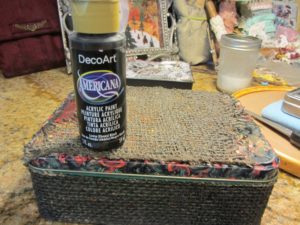
DecoArt Acrylic paints; Black, Honey Brown, Burnt Umber, Light Cinnamon.
Step One
Select trinket that you think you would like to use on your project. First put them randomly around on the project to see if you have enough or too many. Either arrange the trinkets on the box or the tin or you can design on something flat and all one color. I have the perfect light blue folder made out of a soft fabric that I frequently use.
For the owl tin, I glued the burlap first directly onto the tin with a mixture of tacky glue and water (about 50/50), then let it dry completely.
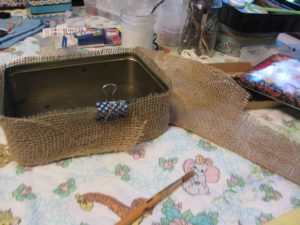
I made a mixture of black paint and water so it would be thin enough to get into the burlap crevices.
After the paint is completely dry, begin to glue the trinkets and owls on top of the burlap with the Power Tac. Start by putting the trinkets that you know you want in a particular space. For example, I knew that I wanted the owls to be in a certain place. So start there and see what feels right next. Arrange the trinkets first layer, then glue in place on top of the burlap.
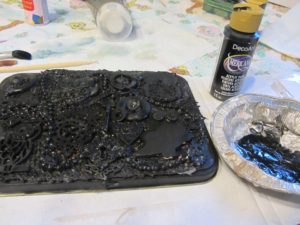
After everything is glued down with Power- Tac and completely dry, covered everything with the tacky glue mixture. I paint or use a sponge brush to cover the entire top. This ensures that everything is secure in its place and isn’t going anywhere. Let dry completely.
I use the Power Tac glue by Beacon to glue my trinket on my box or tin because it has no odor and hold everything in place, but will give you some time to adjust if you need it.
Step Two
Covered the tops with clear Gesso and let dry.
Step Three
Next, I painted the top with black acrylic paint. Let dry.
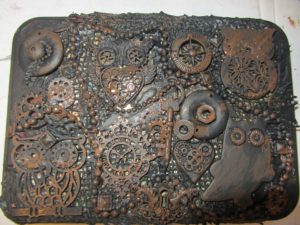
The dry brush technique is always the best when applying top coats of any color. You want to have a layered look. To achieve this, keep adding light strokes of different colors of brown in this case to the top.
The colors I use are: DecoArt: Burnt Umber, Light Cinnamon and Honey Brown.
Step Four
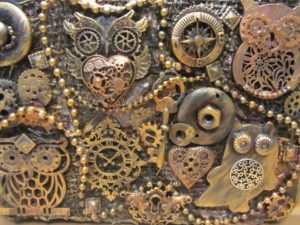
Add the Metallique waxes to give it that rich metal tone effect in different areas of the box. I love the warm glow of Metallique waxes; I added layers of Aged Brass and Copper everywhere.
Step Five
Lastly, kept working with it until you are happy – I love to be happy!!
Step Six
I drilled a couple of holes on the top of this tin to add a handle. Because of the burlap around the sides, I found it a little hard to open. If I was to add the burlap again, I would not add it so close to the top – then it would be fine.

Keep painting and embellishing until satisfied with the look. Because there is no right or wrong it is only done when you say – that it is!
TIP: Collect old broken jewelry, gears, metal pieces, watch parts, clock parts- you never know where they might end up on an altered tin.
Other altered tins you might like:
http://www.seejsjourney.com/steampunk-altered-gift-card-box-for-fathers-day/
http://www.seejsjourney.com/mixed-media-steampunk-gift-box/
Stop by again and see where SeeJsjourney goes next because I am a maker and you never know what I will do next.
